Instalasi Zimbra OSE 10.1.0 di Rocky Linux 8
Instalasi Zimbra OSE 10.1.0 di Rocky Linux 8, Zimbra adalah solusi email, kalender, dan kolaborasi berkelas yang dapat di implementasikan pada public cloud atau private cloud. Dengan antarmuka berbasis browser yang didesain ulang, menawarkan pengalaman mengesankan paling inovatif yang tersedia saat ini, menghubungkan end user dengan informasi dan aktivitas dalam private cloud mereka. Sehingga aplikasi ini layak untuk di pakai pada perusahaan kecil, menengah, besar, sekolah, intansi dll.
Langkah Instalasi Zimbra OSE 10.1.0
1.Instalasi paket yang dibutuhkan
dnf install tar nano wget bind bind-utils telnet perl firewalld nmap-ncat -y
2. Atur TimeZone Centos
timedatectl set-timezone Asia/Jakarta
3. Atur Hostname Centos
hostnamectl set-hostname mail.saad.my.id
4. Stop dan Disable Postfix
systemctl stop postfix
systemctl disable postfix
5. Ubah Hosts Centos
nano /etc/hosts
Masukkan IP Address Centos (Cek Dengan Perintah: ifconfig) IP Contoh: 139.162.24.240. Save dengan Ctrl+o
139.162.24.240 mail.saad.my.id mail
6. Ubah Konfigurasi resolv.conf
nano /etc/resolv.conf
Tambahkan baris berikut, di paling atas. Save dengan Ctrl+o
nameserver 139.162.24.240
Membuat DNS Server Local
7. Create zone di dns server bind
cp /etc/named.conf /etc/named.conf.backup
sed -i 's/listen-on port 53 { 127.0.0.1; };/listen-on port 53 { any; };/g'  /etc/named.conf
sed -i 's/allow-query     { localhost; };/allow-query     { any; };/g'  /etc/named.conf
sed -i '/session-keyfile*/a\        forwarders {8.8.8.8; 8.8.4.4;};' /etc/named.conf;
ubah file /etc/named.conf
nano /etc/named.conf
masukan baris berikut pada baris paling bawah
zone "saad.my.id" {
        type master;
        file "/var/named/saad.my.id.hosts";
        };
8. Create saad.my.id.hosts
nano /var/named/saad.my.id.hosts
Isi dengan baris dibawah (silahkan diubah sesuai nama domain dan IP Address yang digunakan)
$ttl 38400
saad.my.id.      IN      SOA     mail.saad.my.id. admin.saad.my.id. (
                        1520401032
                        10800
                        3600
                        604800
                        38400 )
saad.my.id.       IN      NS      mail.saad.my.id.
mail.saad.my.id.  IN      A       139.162.24.240
saad.my.id.       IN      MX      10 mail
9.Restart dns server bind
systemctl restart named
systemctl enable named
10 Check lookup
nslookup mail.saad.my.id
Bila respon seperti dibawah, konfigurasi sudah benar
[root@mail etc]# nslookup mail.saad.my.id
Server:         139.162.24.240
Address:        139.162.24.240#53

Name:   mail.saad.my.id
Address: 139.162.24.240
Download dan Install Zimbra Mail Server
Untuk dapat membuat mail server dengan zimbra, harus download terlebih dahulu software zimbra, setelah itu di install
1. Download Paket zimbra mail server
cd /opt/
wget https://github.com/maldua/zimbra-foss-builder/releases/download/zimbra-foss-build-rhel-8/10.1.0/zcs-10.1.0_GA_4200000.RHEL8_64.20240719155623.tgz
2. Ekstrak Paket
tar -zxvf zcs-10.1.0_GA_4200000.RHEL8_64.20240719155623.tgz
cd zcs-10.1.0_GA_4200000.RHEL8_64.20240719155623
3. Install Zimbra Mail Server
./install.sh
4. Ketik y kemudian enter
----------------------------------------------------------------------
PLEASE READ THIS AGREEMENT CAREFULLY BEFORE USING THE SOFTWARE.
SYNACOR, INC. ("SYNACOR") WILL ONLY LICENSE THIS SOFTWARE TO YOU IF YOU
FIRST ACCEPT THE TERMS OF THIS AGREEMENT. BY DOWNLOADING OR INSTALLING
THE SOFTWARE, OR USING THE PRODUCT, YOU ARE CONSENTING TO BE BOUND BY
THIS AGREEMENT. IF YOU DO NOT AGREE TO ALL OF THE TERMS OF THIS
AGREEMENT, THEN DO NOT DOWNLOAD, INSTALL OR USE THE PRODUCT.

License Terms for this Zimbra Collaboration Suite Software:
https://www.zimbra.com/license/zimbra-public-eula-2-6.html
----------------------------------------------------------------------


Do you agree with the terms of the software license agreement? [N] y
5. Ketik y Enter
Use Zimbra's package repository [Y] y
Ketik y atau n sesuai contoh dibawah
Select the packages to install

Install zimbra-ldap [Y] y

Install zimbra-logger [Y] y

Install zimbra-mta [Y] y

Install zimbra-dnscache [Y] n

Install zimbra-snmp [Y] y

Install zimbra-store [Y] y

Install zimbra-apache [Y] y

Install zimbra-spell [Y] y

Install zimbra-memcached [Y] y

Install zimbra-proxy [Y] y
6. Ketik y kemudian enter
Installing:
    zimbra-core
    zimbra-ldap
    zimbra-logger
    zimbra-mta
    zimbra-snmp
    zimbra-store
    zimbra-apache
    zimbra-spell
    zimbra-memcached
    zimbra-proxy

The system will be modified.  Continue? [N] y
7. Ketik y, kemudian masukkan nama domain. (tanpa mail. di depan) ikuti contoh dibawah
DNS ERROR resolving MX for mail.saad.my.id
It is suggested that the domain name have an MX record configured in DNS
Change domain name? [Yes] y
Create domain: [mail.saad.my.id] saad.my.id
8. Ubah password admin zimbra, ketik 6 kemudian enter
Main menu

   1) Common Configuration:
   2) zimbra-ldap:                             Enabled
   3) zimbra-logger:                           Enabled
   4) zimbra-mta:                              Enabled
   5) zimbra-snmp:                             Enabled
   6) zimbra-store:                            Enabled
        +Create Admin User:                    yes
        +Admin user to create:                 admin@saad.my.id
******* +Admin Password                        UNSET
        +Anti-virus quarantine user:           virus-quarantine.nb_g1r9h@saad.my.id
        +Enable automated spam training:       yes
        +Spam training user:                   spam.vjmhqic3d@saad.my.id
        +Non-spam(Ham) training user:          ham.tbx6zbcxk5@saad.my.id
        +SMTP host:                            mail.saad.my.id
        +Web server HTTP port:                 8080
        +Web server HTTPS port:                8443
        +Web server mode:                      https
        +IMAP server port:                     7143
        +IMAP server SSL port:                 7993
        +POP server port:                      7110
        +POP server SSL port:                  7995
        +Use spell check server:               yes
        +Spell server URL:                     http://mail.saad.my.id:7780/aspell.php
        +Enable version update checks:         TRUE
        +Enable version update notifications:  TRUE
        +Version update notification email:    admin@saad.my.id
        +Version update source email:          admin@saad.my.id
        +Install mailstore (service webapp):   yes
        +Install UI (zimbra,zimbraAdmin webapps): yes

   7) zimbra-spell:                            Enabled
   8) zimbra-proxy:                            Enabled
   9) Default Class of Service Configuration:
   s) Save config to file
   x) Expand menu
   q) Quit

Address unconfigured (**) items  (? - help) 6
ketik 4 kemudian enter
Store configuration

   1) Status:                                  Enabled
   2) Create Admin User:                       yes
   3) Admin user to create:                    admin@saad.my.id
** 4) Admin Password                           UNSET
   5) Anti-virus quarantine user:              virus-quarantine.nb_g1r9h@saad.my.id
   6) Enable automated spam training:          yes
   7) Spam training user:                      spam.vjmhqic3d@saad.my.id
   8) Non-spam(Ham) training user:             ham.tbx6zbcxk5@saad.my.id
   9) SMTP host:                               mail.saad.my.id
  10) Web server HTTP port:                    8080
  11) Web server HTTPS port:                   8443
  12) Web server mode:                         https
  13) IMAP server port:                        7143
  14) IMAP server SSL port:                    7993
  15) POP server port:                         7110
  16) POP server SSL port:                     7995
  17) Use spell check server:                  yes
  18) Spell server URL:                        http://mail.saad.my.id:7780/aspell.php
  19) Enable version update checks:            TRUE
  20) Enable version update notifications:     TRUE
  21) Version update notification email:       admin@saad.my.id
  22) Version update source email:             admin@saad.my.id
  23) Install mailstore (service webapp):      yes
  24) Install UI (zimbra,zimbraAdmin webapps): yes

Select, or 'r' for previous menu [r] 4
Masukkan password admin (contoh: rahasia10)
Password for admin@saad.my.id (min 6 characters): [we2yDCgHaF] rahasia10
9. Ketik r kemudian enter
Store configuration

   1) Status:                                  Enabled
   2) Create Admin User:                       yes
   3) Admin user to create:                    admin@saad.my.id
   4) Admin Password                           set
   5) Anti-virus quarantine user:              virus-quarantine.zk_wmzll9h@saad.my.id
   6) Enable automated spam training:          yes
   7) Spam training user:                      spam.knyk4g3j5@saad.my.id
   8) Non-spam(Ham) training user:             ham.owqsnc_d@saad.my.id
   9) SMTP host:                               mail.saad.my.id
  10) Web server HTTP port:                    8080
  11) Web server HTTPS port:                   8443
  12) Web server mode:                         https
  13) IMAP server port:                        7143
  14) IMAP server SSL port:                    7993
  15) POP server port:                         7110
  16) POP server SSL port:                     7995
  17) Use spell check server:                  yes
  18) Spell server URL:                        http://mail.saad.my.id:7780/aspell.php
  19) Enable version update checks:            TRUE
  20) Enable version update notifications:     TRUE
  21) Version update notification email:       admin@saad.my.id
  22) Version update source email:             admin@saad.my.id
  23) Install mailstore (service webapp):      yes
  24) Install UI (zimbra,zimbraAdmin webapps): yes

Select, or 'r' for previous menu [r] r
10. Ikutin sesuai petunjuk dibawah
Main menu

   1) Common Configuration:
   2) zimbra-ldap:                             Enabled
   3) zimbra-logger:                           Enabled
   4) zimbra-mta:                              Enabled
   5) zimbra-snmp:                             Enabled
   6) zimbra-store:                            Enabled
   7) zimbra-spell:                            Enabled
   8) zimbra-proxy:                            Enabled
   9) Default Class of Service Configuration:
   s) Save config to file
   x) Expand menu
   q) Quit

*** CONFIGURATION COMPLETE - press 'a' to apply
Select from menu, or press 'a' to apply config (? - help) a
Save configuration data to a file? [Yes] y
Save config in file: [/opt/zimbra/config.19068]
Saving config in /opt/zimbra/config.19068...done.
The system will be modified - continue? [No] y
11. Ketik n kemudian enter
You have the option of notifying Zimbra of your installation.
This helps us to track the uptake of the Zimbra Collaboration Server.
The only information that will be transmitted is:
        The VERSION of zcs installed (10.1.0_GA_4200000_RHEL8_64)
        The ADMIN EMAIL ADDRESS created (admin@saad.my.id)

Notify Zimbra of your installation? [Yes] n
12. Tekan Enter
Moving /tmp/zmsetup.20240823-185715.log to /opt/zimbra/log


Configuration complete - press return to exit
13. Jalankan firewalld
systemctl start firewalld
systemctl enable firewalld
14. Masukkan perintah berikut untuk membuka port akses zimbra, copy+paste kemudian enter
firewall-cmd --permanent --zone=public --add-port=25/tcp
firewall-cmd --permanent --zone=public --add-port=80/tcp
firewall-cmd --permanent --zone=public --add-port=110/tcp
firewall-cmd --permanent --zone=public --add-port=143/tcp
firewall-cmd --permanent --zone=public --add-port=443/tcp
firewall-cmd --permanent --zone=public --add-port=465/tcp
firewall-cmd --permanent --zone=public --add-port=587/tcp
firewall-cmd --permanent --zone=public --add-port=993/tcp
firewall-cmd --permanent --zone=public --add-port=995/tcp
firewall-cmd --permanent --zone=public --add-port=3443/tcp
firewall-cmd --permanent --zone=public --add-port=5222/tcp
firewall-cmd --permanent --zone=public --add-port=5223/tcp
firewall-cmd --permanent --zone=public --add-port=9071/tcp
firewall-cmd --permanent --zone=public --add-port=8443/tcp
firewall-cmd --permanent --zone=public --add-port=7071/tcp
firewall-cmd --permanent --zone=public --add-port=53/tcp
firewall-cmd --permanent --zone=public --add-port=53/udp
firewall-cmd --reload
15. Disable Modern UI
su - zimbra -c "zmprov mcf zimbraModernWebClientDisabled TRUE"
su - zimbra -c "zmprov mc default zimbraPrefClientType advanced"
su - zimbra -c "zmcontrol restart"
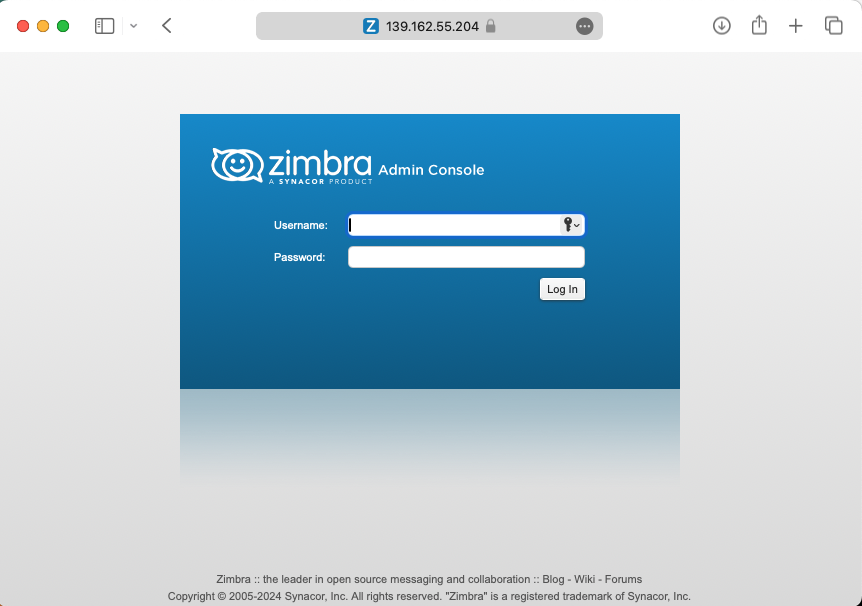
Akses Zimbra admin: https://139.162.24.240:7071
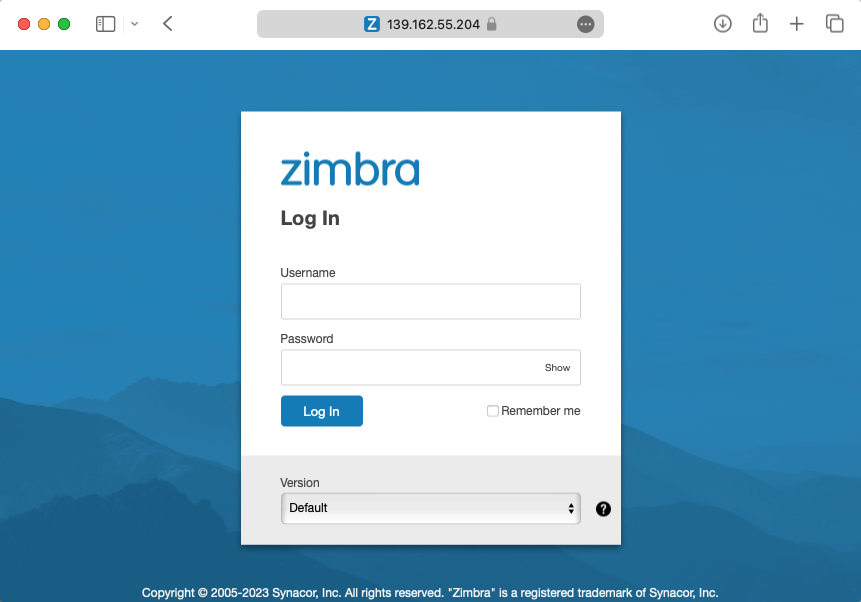
Akses Web Client: https://139.162.24.240
Video:
Selamat mencoba…
Tertarik menggunakan zimbra??
“Bila membutuhkan layanan implementasi, VPS, Maintenance Bulanan, dan SSL untuk dapat membuat mail server dengan zimbra dapat menghubungi kami melalui WhatsApp atau pada contact”
Berikut layanan yang ada di saadwebid terkait zimbra
Layanan Jasa Maintenance Zimbra
Layanan Jasa Migrasi Zimbra Mail Server
VPS/Cloud Zimbra
SSL Zimbra Mail Server
SMTP Relay
Layanan Antivirus, Antispam dan Antimalware


